Soda Pop!

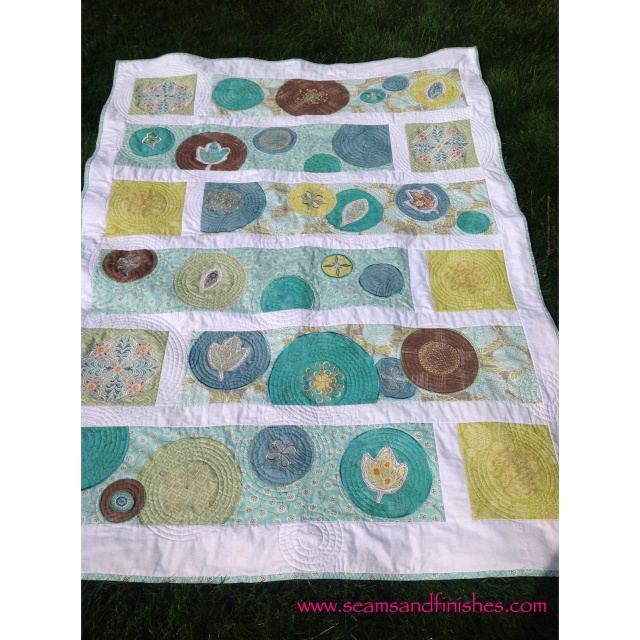
Let’s see…When we left off, I had just posted about our visit to  the quilt exhibit at the MFA.  Coincidentally, not long after, I received an e-mail announcing a new collection of embroidery designs, Modern Blossoms, coordinating with  Amanda Murphy‘s Soda Pop Quilt pattern.

Amanda Murphy Soda Pop Quilt

The scene was set.  I ordered the designs, and soon set out to locate the pattern in a nearby shop. It turned-out to be a  very successful shopping trip and included picking up some of the fabrics for the project!  I was excited to get started but was in the midst of a Christmas quilt gifted to me last year that I wanted to complete for the holiday season.

So, after Christmas I finally got started.

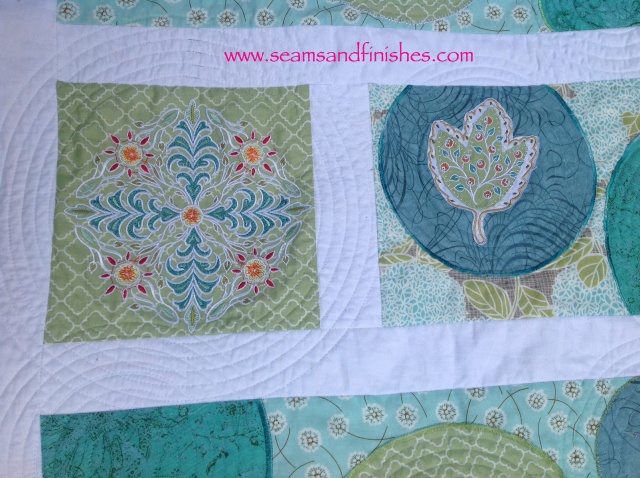
Modern Blossoms Designs

When the first design (seen on the left) was loaded into the machine, it told me the stitching time for that design would be 2 hours.  The leaf on the right is an applique with embroidery used to tack it down and embellish on top.  In total, I think there are 25-30 different designs that I chose to use, but the stitch-out time for each design varied.

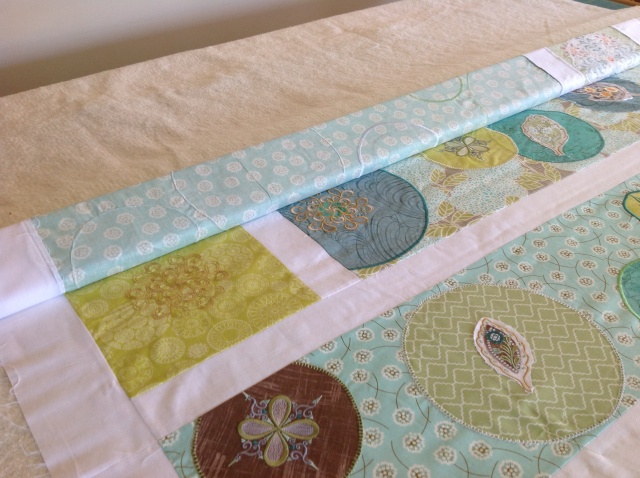
Once the the embroidery was done, and the quilt top completed, I had to figure-out a way to layer this quilt, keeping the layers flat.  To be honest, this is the largest and most complex quilt I’ve ever made so there’s lot of material to contend with!

Problem solved through a YouTube video where Sharon Schambler demonstrates just how to do this!

image

Next was deciding how to do the actual quilting.  I really liked and wanted to duplicate (if possible) the concentric circles that are seen in the original quilt and I knew that probably the only way for me to do that would be  by embroidery machine.  So I digitized a few concentric circles in my software for the quilting.
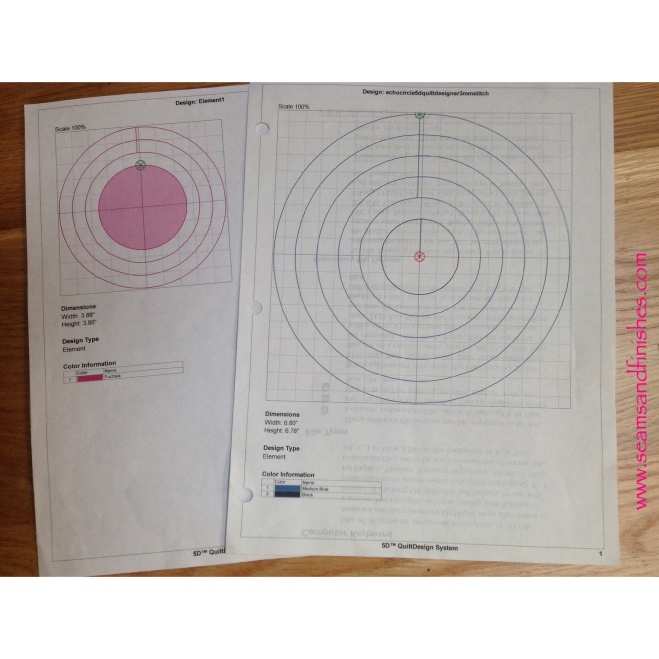
Digitized quiltingI used a 200x200mm hoop for all of the circles with the exception of the largest design which needed to be split for two hoopings in the 360×200 hoop.

Due to the size of the quilt (48×66″), I moved my machine to my cutting table so the weight of the quilt would be supported.

Working on this project was challenging at times, but it was a great learning experience.  I know that more experienced quilters talk about signing your quilt with your name & date .  So in that vein…

I even made a label.
Quilt Label

Quilts and Color

It was slightly overcast weather-wise today, but that had no effect on the exhibit we were about to see at the Museum of Fine Arts in Boston.

The Quilts and Color – Pilgrim/Roy exhibit has been at the Museum since April, but will conclude its run here next week-end, so with time running out, we headed in-town to see this inspiring collection.

Focusing on the ways in which the quilt artists and designers used color theory to create optical illusions and relationships between colors, the exhibit also illustrates the hours of careful and dedicated handwork necessary for producing these works of art. Some of the quilts date back to the 19th century and have certainly withstood the test of time.

Here are some of my favorites in the exhibit with a couple of details included. One is from a Log Cabin quilt that has silk embroidery in the center of the square.

If this collection finds its way to a museum close to you, I hope you consider viewing it.

Totally inspiring!


Liebster Award

Have you noticed the Liebster awards recently appearing on the blogs you enjoy?
Well, today I’m honored that the lovely Chuleenan from CSews has been kind enough to nominate me for this award. Thank you, Chuleenan for your recognition.
 

Here’s what you do when you are nominated

1. Thank the blogger who nominated you

2. Answer the 11 questions given to you

3. Nominate 11 other followers with less than 500 followers

4. Post 11 questions for your nominees to answer

5.Tag your nominees & post a comment on their blog to let them know you nominated them.

Now, let’s see how I do at answering your questions!

1. What is the first thing you sewed that you liked enough to wear in public?

The first garment that I ever made was in the 5th grade. Everyone made a gathered skirt. The seams were sewn by machine, but all of the gathering stitches were done by hand running stitches. It took a long time as we only had class once a week.

2. Where did you grow up?

I grew up in Boston, and still live within commuting distance so get there often.

3. What are your favorite colors?

I’d probably have to say that I gravitate towards pink, green and red.

4. What’s your favorite season of the year?

Summer!

5. What’s the last sewing book you bought?

Colette’s new Sewing with Knits! (waiting patiently for it’s arrival and it was shipped today!)

6. Have you made anything from a vintage (or vintage-inspired) sewing pattern?

While I really appreciate and admire many of the vintage-style patterns, my style is more casual and largely influenced by the fashion houses of Eddie Bauer & LL Bean! However, something I’ve recently discovered that “vintage” includes patterns from the ’70’s, so I guess I was sewing those when they were first in style. Does that answer this question? 🙂

7. If so, did you like how it turned out and did you wear it out?

I’ve always liked the clothes I’ve made, but as styles changed, some were retired from my closet. I still have a couple of wool tailored jackets/coats that were made while I was an undergrad that I hold onto for sentimental reasons, I guess.

8. What helpful sewing tip did you pick up over the past year?

I can’t think of a tip that I’ve come across recently, but I’ll share a couple of my own.

When machine basting, I use up my partially-filled bobbins in contrasting colors from the project being sewn- it makes it easy to remove those stitches later and uses-up those bobbins!

When doing two rows of machine gathering, I sew 3/8 and 6/8 away from the fabric edge so that the permanent stitching is well between those basting lines. The added benefit is that the gathers are smoother and easier to control.
9. What’s your favorite sewing machine presser foot?
I use the Blind Hem Foot quite often.

10. What’s your favorite cuisine (Thai, French, Italian, etc.)?

#1 is seafood, but being a foodie of sorts, I enjoy (too much, maybe?) Thai, Italian Mexican…tho I can’t really endear myself to sushi.

11. What’s your favorite dessert? If you have a recipe, please share it!

My favorite dessert is ice cream, followed closely by anything chocolate.

And here are the blogs that I am happy to nominate! I used Bloglovin & WordPress to help me select my nominees, but really, I don’t know how accurate those counts are. What I do know is there is lots of variety and talent herein.

Bluebirds Singing

Cashmerette

Couture Academic

Gently Down the Seam

Lauren Dahl

Notes from a Mad Housewife

Overflowing Stash

Sew Wrong

Seymour

Starcross Sewing

Threadtime

And the questions I hope they can answer!

1. What is your favorite fabric to sew?

2. What will be your next sewing project?

3. What was your favorite subject in school?

4. Favorite meal to cook or name of a favorite recipe.

5. Three words to describe yourself

6. One thing you can’t live without.

7. Words of wisdom or words to live by.

8. What do you look for in a blog?

9. A book to recommend .

10. An accomplishment that makes you proud

11. Something about you that people would be surprised to know.


An Irish Blessing!

As you probably know, Boston is home to people of many nationalities and cultures. But as an old Irishman once said, “On St. Paddy’s Day there are two kinds of people: the Irish and those that wish they were!”

Perhaps not the most “politically correct” statement to be made, but in the spirit of celebration- everyone can enjoy a good time, regardless of your ethnicity or beliefs.

If you live in Suffolk County, March 17 is also a legal holiday- Evacuation Day, marking the day in 1776 when the British left Boston Harbor during the Revolutionary War.

The big South Boston parade (which I have never attended) was on the 16th, but the St. Patrick’s celebrating apparently started early on the week-end.!  We had tickets for the Boston Ballet performance of Cinderella (which was awesome, btw) on Saturday night so decided to have dinner at Quincy Market before the show. Already,there were many revelers dressed in all shades of green gathering in groups or standing in lines to enter the various restaurants and bars. Lots of spirit and fun was evident, and the evening had not yet begun!

A few hours later, on our train ride home we seemed to be in the “party car” with some “celebrants” singing and attempting to dance ??? at 60mph???  They were enjoying themselves!

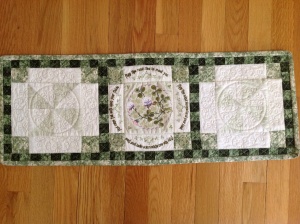
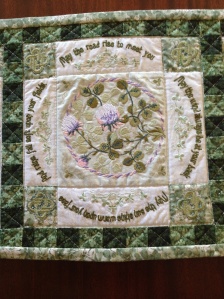
Now, onto other things!  How about this table runner made from San Francisco Stitch  Company?  Irish table runnerThis was such a fun project and I’m thrilled with how it turned out.  All of the embroidery and quilting is done “in the hoop” by machine.Irish Runner

I think this table runner will be lingering on my table for a while longer, too.Irish Blessing

Presidio Purse Revisited


Hi Everyone! The weather here is finally warm enough to consider taking pictures outside and showing off what I have been working on- my adaptation of the Presidio Purse!

In case you missed it, Seamstress Erin has just finished a sew along of her latest pattern, the Presidio Purse.The bag is very generous in size and not difficult to construct, but after making my first one, I really wanted something that was more on a smaller scale for everyday use. So… I set to work…

The first thing I did was to measure and compare the sizes of bags I already have. That “research” revealed that most bags I have were an average of 1 3/4 inches shorter than the Presidio Purse. Not really that much of a difference, but I still felt that the size was not right for me.

With that information, I started to modify the pattern by overlapping the bottom portion of the pattern by that 1 3/4 inches. Then I made some adjustments to the combined side/bottom piece and created a muslin. I knew right away that this was not the “look” I was going for, either. There was still something that was “too big” but progress was being made!

Then I decided maybe I could eliminate the side/bottom piece altogether and create depth to the purse by adding darts! Ding ding ding…We have a winner!

Here you can see the pattern changes in order:

Overlap the bottom portion of the front/back pierce 1 3/4″ and shorten the bottom portion of the zipper pocket piece by the same amount. (I just folded it under). The darts are 1″ long with a total take-up for each dart at 1 1/2″.


On the front & backI used a woven fusible interfacing and also on the following lining pieces:

  • 1 lower zipper pocket piece
  • 2 handles
  • 2 handle anchors
  • small pocket piece*

* I cut the small pocket on the fold, interfaced half of it and sewed it right sides together, leaving an opening to turn right sides out. (No raw edges ).


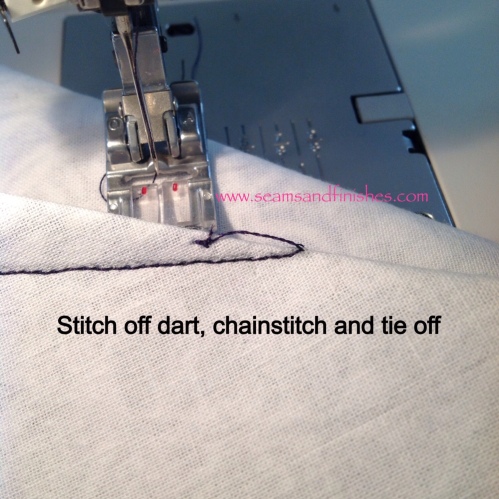
A close-up of sewing the darts: To eliminate the dimple at the point of a dart, stitch off the point and continue stitching a thread chain. Lift your presser foot an re-position the needle within the dart fold and tie-off.

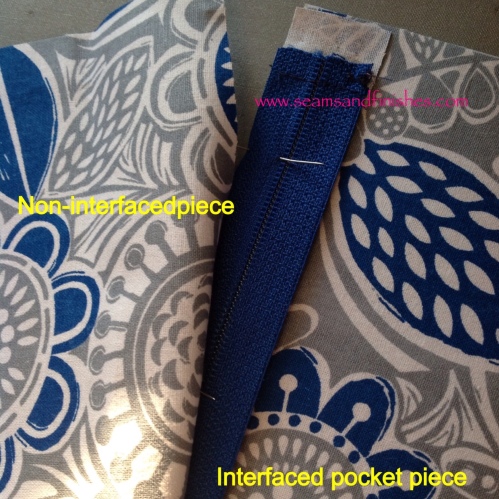
Sandwich the zipper between the 2 lower large pocket pieces, having the one with the interfacing on the bottom. Repeat with the remaining top pocket pieces and neither of these pieces is interfaced. (This is the same technique used for inserting the main zipper in the Presidio Purse.)


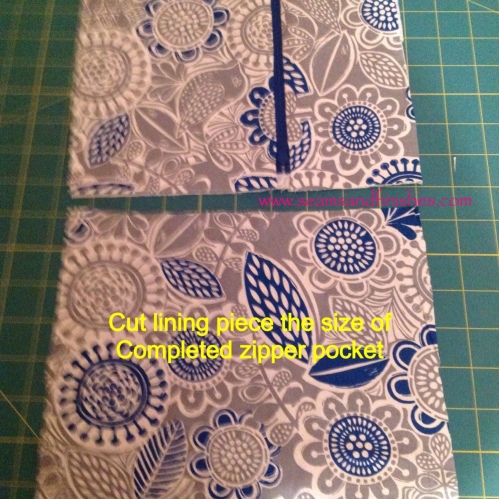
Cut pocket lining the same size as completed zipper pocket.


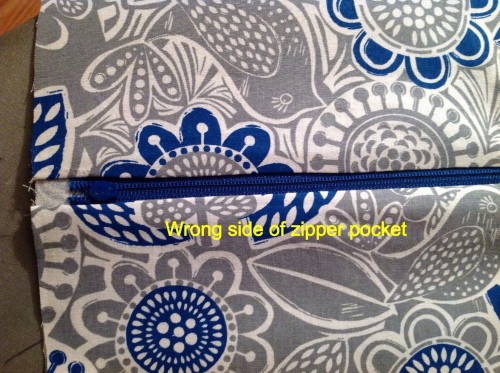
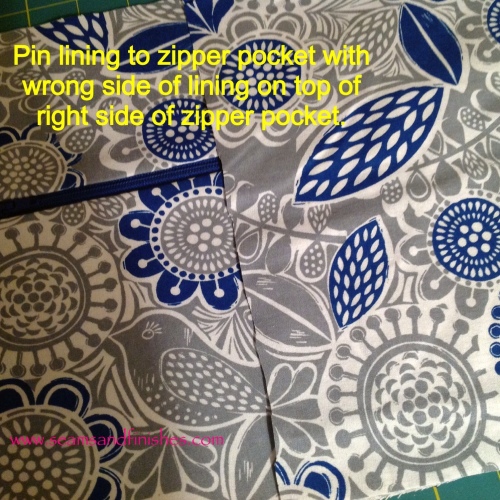
Place WRONG side of this piece on top the right side of the zipper pocket. Stitch together with 1/4″ seam on 3 sides, leaving top open. Trim corners & turn to right side & press. When this pocket assembly is stitched to the lining with 1/4″ seam, there will be no raw edges inside, and the right side of the lining is visible when you unzip the pocket!

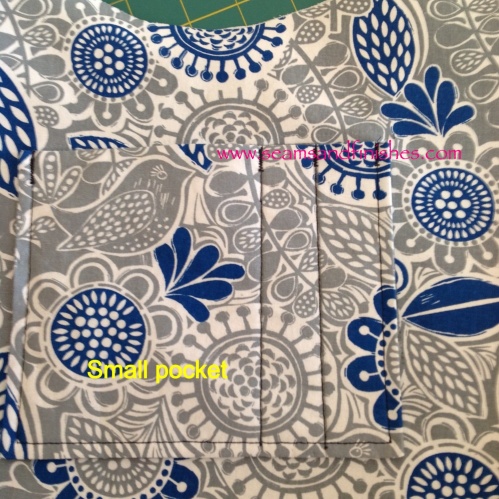
Small pocket stitched to lining (reinforced with bar tacks).


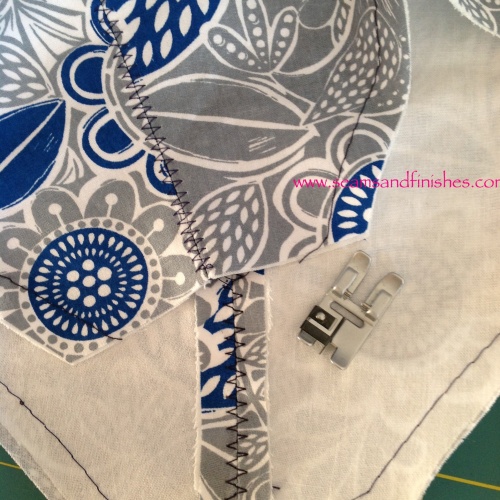
Once the pockets were stitched to the front & back lining pieces, it was time to stitch the front & back together. After doing this, I pressed the seams open and used a 2-step zig-zag stitch along the seam to keep it open.

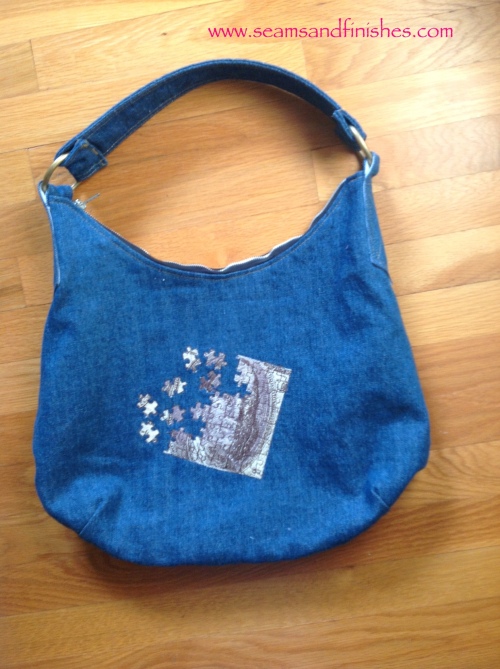
Now, onto the bag, itself! I was able to find some 10 oz. wt denim at Joann's and that was perfect, because I wanted to make this bag very casual and do some machine embroidery on the front! (I'll get to that, shortly!)

Embroidery done and bag assembled, here are a few details:

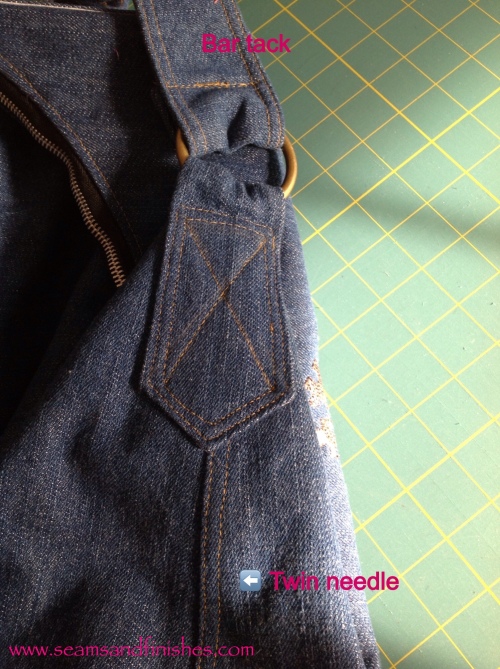
  • Top stitched the seam using a 6.0/100 needle with regular thread. I have not had a great deal of luck using top-stitching thread in the past. If you like more definition, you can thread the needles with two of the same weight thread to get a slightly thicker appearance or use 2 different colors in the same needle for an even different look!
  • For top stitching handle & anchors and construction, a jeans/denim size 100 needle was used.
  • Bar tacks were added on the handle after I attached it to the ring for extra security, and it goes along with a jeans style!
  • The 2″ rings were ordered from Pacific Trimming.


Here is the finished bag!

The design is from “Worth Every Penny”, a collection found here.

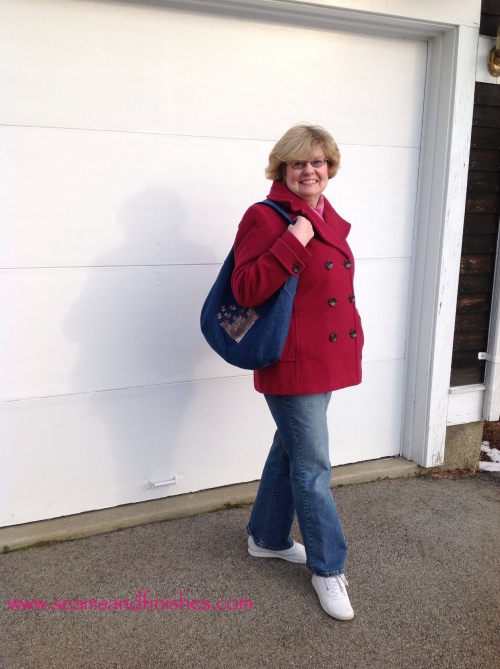
And here is the bag in action!


Presidio Purse Pattern

Seamstress Erin has just released her first pattern, The Presidio Purse! In fact, she is currently hosting a sew-along, so you still have the opportunity to join her in making one of your own!

Presidio Purse

Early last month Erin selected a group of volunteers to test this pattern. With a 2-week deadline and the holiday rush, I quickly got to work. The pattern is downloadable for either a copy shop or home version. I printed it at home and was done in no time.

Next stop: The Large Fabric Store Chain.

Now, the original description given was that this purse could be carry-on luggage size, and the recommended interfacing would be firm. I chose to interface my lining with a fusible that is recommended for handbags. Although it worked-out fine, it was not easy to sew and difficult to maneuver under the machine. I had to wrestle with it, like working with a life vest! Check-out Erin’s discussion here outlining fabric selection choices.

Presidio Purse

The directions and illustrations for making this purse are well thought out. I did make a couple of changes to the pockets by interfacing them for sturdiness & functionality and lining them so there are no raw edges, but these are my personal preferences.

Presidio Purse interior

For the hardware I used a 2″ D-ring which was not rectangular and I’m very pleased. One thing I really like about this purse is the length of the handle and its orientation on the bag – it feels very comfortable slung over my shoulder!

What’s next?

Well, I’m going to be making a second Presidio Purse (pre-shrinking fabric as I type), but I’m going to experiment with scaling the size down a little as this bag a lot larger than I am used to using regularly. Plus I have a few “embellishment” ideas percolating.

The shape of this bag just beckons playing around with design elements like color blocking, jeans recycling, embroidery, fabric stamping, pleating, tucks…

Is there a Presidio Purse in your future?

Christmas Ornament Exchange

You may have noticed that some of the sewing bloggers you read have been exchanging handmade Christmas ornaments and posting tutorials demonstrating how to make them too!

Well, thanks to Kelli of True Bias, more bloggers (like myself) were given the opportunity to sign-up to participate in this activity as well.

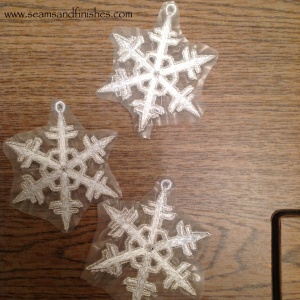
I submitted my name as a participant, and decided that my handmade ornament would be to make lace snowflakes!  The bonus here is that you can either hang them on your Christmas tree, or enjoy them in a window throughout the winter season!

if you are not familiar with machine embroidery, these snowflakes are known as FSL, or Freestanding Lace.  I purchased these particular designs from Snowlady Designs but there are many other vendors of lace designs.

After downloading the design to my computer software, I duplicated the design as many times as I could fit into my hoop and then transferred that to my machine.

Here is a print-out of the snowflakes as they will be stitched.

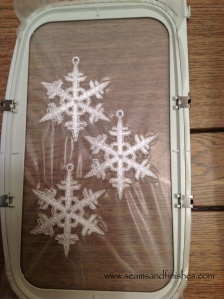
Next, I hooped a thick water-soluble stabilizer, pressed the “start” button and watched them stitch!

image

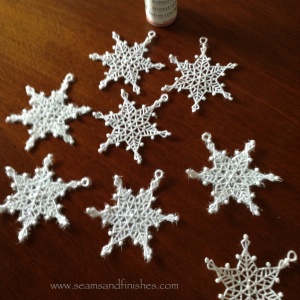
Once they are done, unhoop and trim around each snowflake before soaking the snowflakes in water to dissolve the stabilizer.

image

When they are dry, I like to give them just a touch of white glitter paint! (Sometimes a little more than a touch!)

Here are the finished snowflakes I made for the exchange:

image

And here are three different ones that I just made from the same designer.

image

My mailbox has brought me some delightful handcrafted Christmas ornaments over the past few days and introduced me to some talented and creative bloggers whom I might otherwise not found.

I hope you have a moment to stop by and enjoy these lovely blogs too!

http://nutta.typepad.com/

http://seemore-dreammore.blogspot.com

http://bonnechanceblogspot.blogspot.com

http://www.dandeliondrift.com

<a href=”http://www.bloglovin.com/blog/10328877/?claim=wqw2fjdcgu3″>Follow my blog with Bloglovin</a>

Pattern Pyramid Craft Edition Winner!

Crafty Patterns

Congratulations Craftbinder!

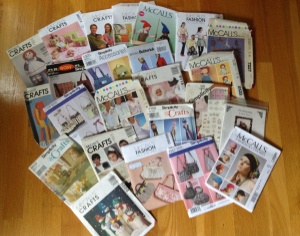
You are the lucky winner of the Crafty Pattern Pyramid.  There are lots of patterns here for holiday gift-giving and beyond!

If you would be kind enough to contact me and provide a mailing address, these patterns will be arriving at your doorstep in no time!

My e-mail can be found by clicking the “About” tab page. I’m so excited to see where this pyramid travels!

Talk soon,

~ Ellen

Cranberry Creativity

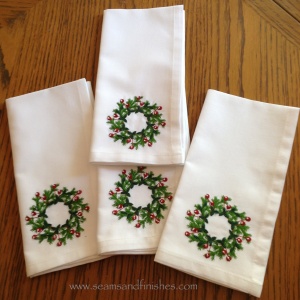
With Thanksgiving fast approaching, I have just completed these additions to a set of dinner napkins I made as a Christmas gift last year.

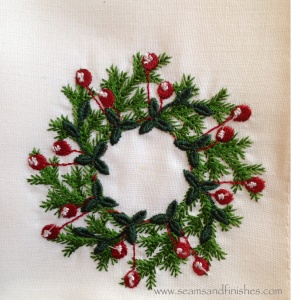
Cranberry wreath- Dancing Threads

Cranberry wreath Dancing Threads

This cranberry wreath design is one I fortunately picked up  from a site which is no longer available.  The digitizer, Dancing Threads now markets her designs here, but this design is not among her current collection.  I keep checking back, hoping to see any other “cranberry inspired” designs as they are perfect for gift-giving to friends involved in the cranberry industry!

And while we’re on the subject of cranberries and Thanksgiving, I thought I’d share a “traditional” favorite:

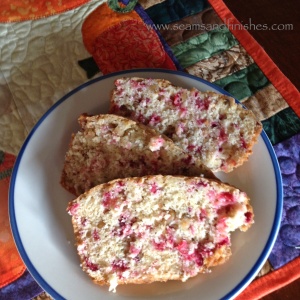
Cranberry nut bread

Classic Cranberry Nut Bread

Ingredients:

2 cups flour
1 cup sugar
1 1/2 teaspoons baking powder
1 teaspoon salt
1/2 teaspoon baking soda
3/4 cup orange juice
1 tablespoon grated orange peel
2 tablespoons shortening
1 egg, well beaten
1 1/2 cups Fresh or Frozen Cranberries, coarsely chopped
1/2 cup chopped nuts

Directions:

Preheat oven to 350ºF. Grease a 9 x 5-inch loaf pan.

Mix together flour, sugar, baking powder, salt and baking soda in a medium mixing bowl. Stir in orange juice, orange peel, shortening and egg. Mix until well blended. Stir in cranberries and nuts. Spread evenly in loaf pan.

Bake for 55 minutes or until a toothpick inserted in the center comes out clean. Cool on a rack for 15 minutes. Remove from pan; cool completely. Wrap and store overnight. Makes 1 loaf (16 slices).

PER SERVING (1 slice): Cal. 211, Fat Cal. 54, Protein 3grams, Carb. 37grams, Fat 6grams, Chol. 18mg., Sodium 313mg.

The recipe can be found here, along with many others…

Before I forget, you still have time to leave a comment on my last post if you would like to win some “crafty patterns” in the Craft Pattern Pyramid!